

Yes – You can change a toilet yourself! You don’t always need a plumber, and yes – woman can install toilets!
Read more: My Toilet Changing StoryI’m on Lake Nipissing, Northern Ontario Canada fishing for early spring walleye with my son when I receive the text from Lillie: “I’ve replaced the toilet in the downstairs washroom”. Just an fyi, my wife is a beautiful woman, and all lady and all I can think to myself is, I gotta go fishing more often!
Lillie’s Husband
Toilet Talk
Alright, you never expected to hear toilet talk from me. I’ve never been known to be a potty mouth. Bathroom renovations are expensive. As with kitchen renovations, you can spend tens of thousands of dollars on a bathroom renovation. When we say bathroom renovation, contractors get quite excited and their eyes dance with dollar signs.
More and Newer Bathrooms Increase House Value
Real Estate agents value houses based upon bathroom quantities, features and style. It’s crucial to invest the right amount of work and effort into bathrooms to improve the value of a house – without going broke or investing beyond a neighbournood’s value. As we are planning to sell our house at some time in the near future it’s important to have functional, new and spotlessly clean bathroom fixtures and finishes.
Then there is just the benefit of improving a bathroom for our own enjoyment and function. In our 130 year old house, we are fortunate that the bathrooms both function reasonably and are not too “dated”. The downstairs bathroom is small, has peeling vinyl flooring, has a pipe that freezes in the winter, and has 1990’s-2000 style. I would like it to have a sense of the Victorian style, while functioning a little better, and being a bit brighter. It would be nice to add a downstairs shower, but I just don’t see how to squeeze the space out for this.
(Later on – we had our upstairs laundry room converted to a 3 piece bathroom – but that’s another story)
We had started to take this bathroom apart earlier – but were waiting to finish it until the winter was over and the risk of pipes freezing was past. Then, the pandemic arrived and we knew our kids were coming home from school. So we waited a little longer to get going. In the meantime we had ordered and picked up a new toilet from Lowes, and of course already had the penny tiles ready.
In the meantime, the toilet had it’s handle replaced, and then it broke again. SOMEBODY SUGGESTED THAT PERHAPS I HAD DELIBERATELY BROKEN THE TOILET TO START THE RENO……… Well, that’s just another crazy conspiracy theory don’t you think?

So we had 6 adults at home, and then our daughter flew off to British Columbia, two of the boys went back to work, and then it happened. The day after the toilet handle broke, my husband and our middle son went fishing for 2 days. That was it for me. There was nobody home for the day. What do you do when you get the house to yourself for the day? I decided to indulge myself and do what I really wanted to do. Conquer the toilet replacement.
In empty-nest pre-pandemic time frames we would have ripped out the toilet and sink, floor, etc., applied a new floor over a few days, applied the trim, added the toilet, moved the sink, painted and la de dah. At this time, I just wanted to replace the toilet over a small tiled area of the floor within as short a period of time as possible, while I had everyone out of the house.
Can a Real Housewife replace a toilet by herself? Or is a “should she” question? And could she do it in one day? Maybe. I should tell you though that this is not my first toilet rodeo. In our old home, I replaced all four toilets over the years. The thing is, it’s not a difficult task, it just requires a bit of strength, and it’s much better to have 2 people for the awkward parts, but I’m stubborn about these things and just wanted to get going. (so to speak).
The most important issue is the toilet – installed likely in the 1970s or 80s – did not flush well. It was also low. Happily though, it is equipped with a mostly properly plumbed turn-off valve. This is the key to an easy toilet installation. It’s one of those things that seems like an unwomanly impossible wait for the plumber jobs, but it doesn’t have to be. It’s not pretty or pleasant work, but it is something that can likely be achieved without much knowledge or ability.
Toilet Water Valve
The first step is ensuring that the water turn off valve turns off properly. It did! Yeah. One of my previous toilet installations went badly, because the valve needed to be replaced, and I decided to cut the pipe and install a new one after hours of watching how to Youtube videos on the subject, and guess what – I cut the pipe too close to the wall – and jaggedly – I had to give up and call a plumber on a Friday afternoon on a long weekend. NEVER start a plumbing project which might involve you calling a plumber during emergency hours – that’ll cost you…..

So I turned off the water, and then set about draining the toilet – flushing – and then using a Shop Vac to remove the rest of the water from the back and bowl. (Dont tell my husband that I used his favourite Shop Vac for this, – he’ll never vacuum again). Then I unscrewed the water feed hose from the toilet tank and all was good – so far.
Then it was time to remove the bolts that anchor the toilet to the floor. Newer toilets use 2 bolts. This older toilet had 4. I googled this extensively, and it’s apparently OK to just convert to 2 bolts. (Later when I removed the toilet, I found that two bolts were in the flange, while two bolts were just stuck in the plywood floor, through the vinyl floor.)
Two bolts came off easily, and I was feeling overconfident and giddy. The third one gave me some trouble and it seemed like about an hour to undo it with 2 sets of pliers – one in each hand. This wore me out and I had to retreat for a bit and watch some HGTV to get myself going again.
The fourth bolt would not undo for anything. I tried all manner of tools, some WD-40 (a hydrocarbon based lubricant), and some Jig-a-loo (a silicone based lubricant). The last bolt would not budge. My neighbour the plumber was watching his kids play in my driveway…… It would have been so easy to ask him, but then it wouldn’t be a win for me. I needed to do it myself. I grabbed a hammer and wacked away at the base of the toilet around the bolt.
Note – Remember to wear safety glasses next time – something unpleasant got in my eye in the process, but it’s better now……
The base of the toilet cracked, and bingo – the toilet was free. I pulled up on the toilet over the 3 anchors sticking out of the floor and it was done. Happily, I put the toilet in the backyard as a surprise for my husband to find when he got home. The toilet was really heavy, and almost beyond my strength to lift, but I was working on adrenaline now, my Superpowers kicked in.
Then it was time for the fun part – the toilet was gone and the good news was that the flange that it was installed on was sturdy and didn’t need replacing. This is the second area where I might have needed some plumbing or carpentry assistance. If a toilet has been leaking over the years – the plywood flooring the flange is installed on can be unpleasant and falling apart – and I don’t think my skill level is ready for replacing one. Fortunately the floor and flange were good – and I scraped away the wax seal (WITH GLOVES and a plastic scraper). The gloves, scraper and seal all went directly into the garbage. I also removed the toilet anchor bolts from the floor and disposed of them.
At this point, I covered the hole with a plastic margarine container, and quickly applied some penny tiles over the plywood floor just in the 2 foot area around the toilet. I will post about the penny tile project later. Normally we would do the whole bathroom floor at the same time, but this was a pandemic-toilet-opportunity. I did just the area immediately surrounding the toilet – so that I could stand on the rest of the floor to get the new toilet quickly installed.
I took a very long break after that and read the toilet installation instructions over and over. Usually I prefer to purchase a one piece toilet – less assembly and less risk of future leaking at the join between the tank and bowl. I could not find a reasonably priced toilet in the shape that I wanted. I had wanted the elongated bowl (apparently men like that better but I don’t want to think about why), and key for me was buying a chair height toilet, and having a 1.6 Gallons per Flush capability.
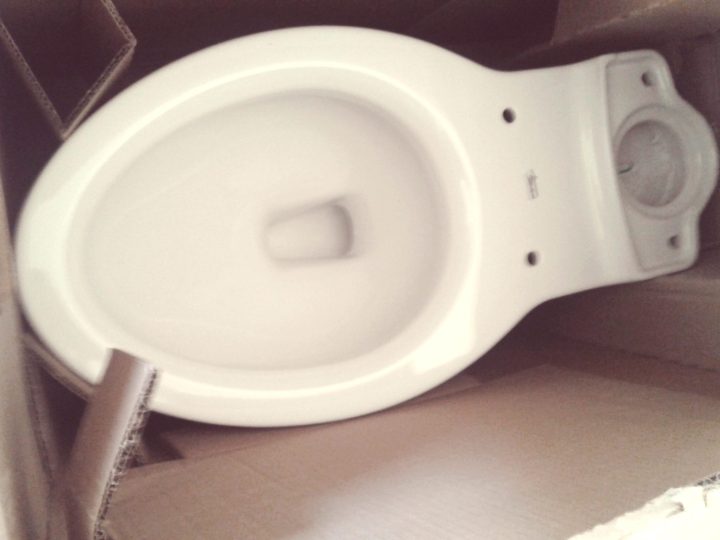
Chair height toilets are easier for senior citizens to get up from. (I’m thinking about my 91 year old mom visiting, but I’m not getting any younger). The Edgemere toilet that we purchased was reasonably priced and had a dual flush (one water-saving, and one higher capacity flush – remember that we have 3 young adult sons……)
It turned out that it was easier for me to work with a 2 piece toilet anyway – it was lighter for me to install the bowl part first and then attach the tank after.
A new wax seal came with my American Stand Edgemere toilet – and sometimes when a ceramic tile floor has been installed you need a taller wax seal, or you can use 2 together. Fortunately the penny tile is fairly thin, and the standard seal was good to go. I installed 2 new anchor screws in the toilet flange, and placed the wax seal over the base of the toilet. All easy so far.
Then it was time to lift the bowl over the anchor screws and hole in the floor and set it in place. It’s important to do this step exactly right as you don’t want to ruin the wax seal buy putting the toilet down in the wrong place – off centre – or missing the screws. It is better to do this step with 2 people, (one person to lower the toilet – and one to give directions) but for some reason this worked perfectly. Things were coming together and I was thinking it was time for a wine break as I was exhausted.
I was getting close to completion though and carried on. I followed the directions carefully and used the bolts and seal provided to attach the tank to the bowl. I fussed a bit with the screws in the lid of the toilet that attach to the dual flushing buttons. Eventually I figured out how to get them to the right height.
Then finally it was time to attach the hose to the back of the toilet. With the new toilet being taller…..(insert dramatic music here)—– the hose was too short. I needed to go to the home improvement store – and it being a pandemic – the stores were closed at this time. I could again have borrowed from the plumber next store, but that would have been a complete defeat.
I attached the seat to the toilet, and settle down to relax for the evening.

The next morning I headed out early to newly opened for socially distant business – Lowes, and bought the right sized hose (well maybe a little too long). I installed it, and VOILA – the toilet filled up and worked BEAUTIFULLY. There were no leaks, anywhere. I love it when a plan comes together! I felt like Superwoman and ready for the next project.
In addition to being a dual flush, chair height, elongated bowl toilet, it has a “slow close” seat (i.e. no slamming) and has and “EverClean glaze which includes an antimicrobial additive that inhibits the growth of stain and odor causing bacteria, mold and mildew on the surface” . This is just what every girl wants…… Honestly though, a new white NEVER BEEN USED toilet that flushes nicely is all anybody needs right? As it seems to be the mom-job to clean toilets, a nice fresh easy-clean toilet is a good thing.
So is toilet installation women’s work? Well yes, but it doesn’t always go so well. There are loads of how to videos available on Youtube to show you how it’s done, so you can decide for yourself! The family was happy with my project – although I probably should have tightened the toilet seat properly. No one was injured fortunately.
Wow, I stand in awe!
Cool!
A true shit job. But well done, lady! 😂
Huzzah!! Well done! 😀 We finished our bathroom reno last summer, it seemed to take forever and soooooo messy. But the design process is fun, isn’t it? And so well worth it and satisfying when it’s done.
My kinda gal! I hope your family celebrated your success.
Thank you Margaret. We sure did. Now we are working together on the floor and sink. Take care!
Awesome! We have a new white toilet added recently and the old gold one is gone. I am delighted every time I visit it, lol lol! I would never have been able to replace ours. I say that. I know we tend to block things out kinda like as kids when we wouldn’t eat green foods. I’ve heard if you have a manual and kind read instructions, you can do most anything. Starting to feel that way about YouTube too. I LOVE YouTube. lol. The hardest part of getting ours installed (we paid someone to do it while doing other plumbing work) was deciding elongated or round. I went with round to save an inch of space. I had no idea it was even a thing. lol. Take care.
Thank you! I know what you mean about not knowing there were different styles of toilets – round or long…..I had no idea there were slow closing seats of all things!
Impressive!
Thank you Ankur!
Getting the design just right goes a long way in setting out a good bathroom. With a smaller bathtub you would be able to maximize the space of your bathroom without sacrificing the luxury of a bathtub.
Hi Kate, a bathtub would certainly nice, but we just don’t have the room for one in this room – I should have called it a powder room. We will be doing a proper bathroom reno upstairs at some time though – hopefully moving or putting in a smaller tub.